
How to Organize a Garden Shed: Storage Ideas That Actually Work

Every gardener knows the feeling. You head out to the shed for a trowel, and fifteen minutes later you are still digging through a tangle of hose, half-empty fertilizer bags, and a rake that seems to have grown extra tines just to snag everything else. By the time you find what you need, the good light is gone and your enthusiasm has gone with it.
I have organized, reorganized, and occasionally surrendered to a lot of garden sheds over the years, from a cramped 6x8 lean-to behind my first rental in Corvallis to the larger workshop-style building I use now. The lesson I keep relearning is that a well-organized shed is not about buying clever gadgets. It is about deciding where things live, making those places easy to reach, and building a few habits that keep the system from sliding back into chaos.
In this guide I will walk you through the whole process: clearing out, planning zones, using your walls and ceiling, storing chemicals and fuel safely, and setting up a maintenance routine so your tools stay sharp and ready. Whether your shed is a tiny prefab kit or a converted outbuilding, these storage ideas actually work in the real world, with muddy boots and all.
Start With a Full Clear-Out
You cannot organize clutter. The first job is to empty the shed completely, even if that feels like overkill. Pick a dry day, lay a tarp on the lawn, and pull out everything. Seeing all of your gear spread out in daylight is the only honest way to know what you own.
Sort Into Four Piles
As items come out, drop them into one of four groups:
- Keep and use: tools and supplies you have touched in the last year or two.
- Repair: a loose shovel handle, a dull pair of loppers, a leaky hose coupling. Be honest about whether you will really fix it.
- Donate or give away: duplicates, tools you have outgrown, and that third wheelbarrow.
- Discard: broken pots, cracked buckets, hardened bags of cement, and expired products. Take old chemicals to a household hazardous waste collection site rather than the trash.
Most people are surprised by how much ends up in the last two piles. In my experience a typical shed loses a quarter to a third of its contents on the first clear-out, and that recovered space is worth more than any shelving unit you could buy.
Clean and Inspect the Structure
With the shed empty, sweep out the cobwebs, check the floor for rot or soft spots, and look for roof leaks, gaps around the door, and signs of mice. Damp is the enemy of every tool you own, so fix leaks and add weatherstripping now. If rodents have been visiting, seal holes larger than a quarter inch with hardware cloth or metal flashing before you move anything back in.
Plan Your Storage Zones
The single most useful idea in shed organization is zoning. Instead of putting things wherever they fit, you give each category of gear a home, and you place those homes according to how often you use them.
Map by Frequency of Use
Stand in the doorway and think of the shed in three bands. The area right inside the door, at waist to shoulder height, is prime real estate. That is where your weekly tools belong. The back corners and high shelves are for seasonal items. Floor space along the walls is for heavy things like mowers, bags of soil, and the wheelbarrow.
| Zone | Location | What Goes There |
|---|---|---|
| Grab-and-go | Near the door, 30–60 inches high | Hand tools, gloves, pruners, twine, plant labels |
| Long-handled tools | Wall beside or opposite the door | Shovels, rakes, hoes, forks, edgers |
| Potting and work | Under a window if possible | Potting bench, trowels, small pots, seed trays |
| Heavy equipment | Floor level, closest to the door ramp | Mower, tiller, wheelbarrow, spreader |
| Chemicals and fuel | High, locked, ventilated corner | Fertilizers, pesticides, gas cans, oil |
| Seasonal and bulk | Back wall, high shelves, rafters | Holiday lights, row covers, stakes, spare pots |
Sketch It Before You Build
Measure your walls and draw a simple floor plan on graph paper. Mark the door swing, windows, and any posts. Then pencil in each zone. This fifteen-minute exercise will save you from hanging a pegboard exactly where the lawn mower handle needs to go.
Pro tip: Leave a clear path at least 30 inches wide from the door to the back of the shed. If you have to move one thing to reach another, you will eventually stop putting things back.
Go Vertical With Wall Storage
In almost every shed, the walls are the most underused storage space. Getting tools off the floor and onto the walls is the fastest way to reclaim room and protect your gear from moisture and damage.
Rails and Hooks for Long-Handled Tools
A heavy-duty steel or aluminum rail with adjustable hooks is the backbone of good shed storage. Mount it into studs about 5 to 6 feet off the floor and hang shovels, rakes, and forks head-up. Keeping metal heads off damp concrete or wood floors makes a real difference to rust. If you have a mix of spades and scoops, it helps to know what each does, and our guide to types of shovels can help you decide which ones earn a hook and which can go.
A cheaper option is a simple 2x4 board screwed across studs with pairs of long dowels or large screws spaced to cradle each handle. It is not fancy, but it works and costs almost nothing.
Pegboard and Slatwall for Small Tools
Pegboard is still one of the best solutions for hand tools. Use quarter-inch hardboard or, better yet, metal pegboard, which will not swell in a humid shed. Mount it on furring strips so the hooks have room behind the board. Group tools by task: pruning tools together, digging tools together, measuring and marking together.
Once your tools are hung, trace around each one with a paint marker. Those outlines are the simplest possible return-to-home system. An empty outline tells you instantly what is missing, and anyone helping in the garden knows exactly where a tool goes back.
Magnetic Strips and Clip Rails
A magnetic knife strip, the kind sold for kitchens, is perfect for small steel items like pruning saws, hori-hori blades, and sharpening files. Keep sharp edges facing the wall so you never reach across an exposed blade. Broom-style spring clips mounted on a board hold handles of different diameters securely and are great for brooms, dust pans, and edgers.
Shelving, Bins, and Containers
Once the walls are working, shelving handles everything that does not hang well: bags, bottles, pots, and boxes of small supplies.
Choosing Shelving
Freestanding metal or heavy-duty plastic shelving is easy to install and move. Wall-mounted brackets with plank shelves are better in small sheds because they keep the floor clear. Aim for shelves about 12 to 16 inches deep. Deeper shelves turn into black holes where things are forgotten behind other things.
- Put the heaviest items, like bags of potting mix and fertilizer, on the lowest shelf.
- Keep everyday items between knee and shoulder height.
- Reserve the top shelf for lightweight, rarely used gear and for products that should be out of children's reach.
Bins That Keep Pests Out
Open bags of birdseed, grass seed, and organic fertilizer are an open invitation to mice. Transfer them into lidded metal cans or thick plastic bins with snap-tight lids. Label every bin on the front and the lid, in large lettering you can read from the doorway.
Clear bins are handy for smaller items like irrigation fittings, plant ties, and spare sprinkler parts, since you can see the contents at a glance. Bag spare parts by system, such as drip, soaker, or overhead, so you are not sorting mixed fittings on a hot afternoon.
Build a Potting Station
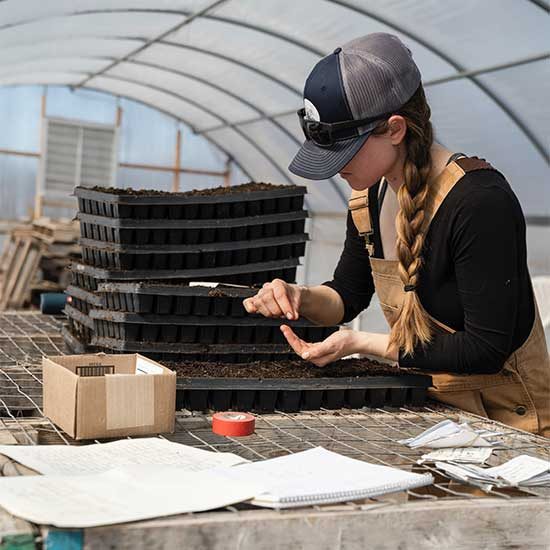
If you have room, a potting bench turns your shed from a storage closet into a workspace. Even a narrow fold-down shelf gives you a place to repot, divide, and clean tools without hunching over a wheelbarrow.
Setting Up the Bench
Place the bench under a window if you can, for natural light. A comfortable working height for most adults is 36 to 38 inches. Add a lip on the back and sides to keep soil from spilling, and a shelf below for bags of mix. Hang your trowels, dibbers, and small hand forks on a short rail or pegboard strip right above the work surface. For help choosing between the many trowel shapes, see our guide to types of trowels.
Soil Bin
A large lidded bin or a pull-out drawer under the bench is ideal for potting mix. You can scoop directly from it rather than wrestling with a sagging bag. Keep a separate small bin for perlite, vermiculite, and compost amendments.
Henry's note: The best upgrade I ever made to my potting bench was a cheap rubber dish tub for mixing soil. It contains the mess, lifts out to dump, and doubles as a tool-soaking tray for cleaning. Nothing clever, just effective.
Safe Storage for Chemicals and Fuel
Garden sheds often hold products that can hurt people, pets, and the environment if stored carelessly. Getting this part right matters more than any aesthetic choice.
Safety: Always keep pesticides, herbicides, and fertilizers in their original labeled containers. Never transfer them into food or drink bottles. Store them in a locked cabinet or on a high shelf out of reach of children and pets, and follow the storage instructions printed on each label.
Chemical Storage Guidelines
- Store liquids below dry products so a leak cannot soak into a bag of granules.
- Keep oxidizers, like some pool chemicals, away from fuels and organic materials.
- Set bottles in a plastic tray to catch drips.
- Protect liquids from freezing, which can crack containers and ruin some formulations.
- Keep sprayers rinsed and dry. Our guide to the garden sprayer covers cleaning and storage in detail.
Fuel and Power Equipment
Store gasoline only in approved containers, and keep the amount small, ideally just what you will use within a month or so. Place fuel away from any ignition source, including water heaters or electrical panels if your shed has them, and make sure there is ventilation. Before winter storage, either run small engines dry or use a fuel stabilizer according to the manufacturer's directions.
Use the Ceiling and the Back of the Door
When the walls fill up, look up. Most sheds have open rafters or at least a few feet of space above head height.
Overhead Racks and Rafter Storage
Lay plywood across exposed ceiling joists to create a loft for light, seasonal items: row covers, shade cloth, bundled bamboo stakes, and empty flats. Ceiling-mounted racks designed for garages work well in larger sheds. Keep anything heavy off overhead storage, and make sure your framing can take the load.
Door Storage
The back of the shed door is perfect for a shallow shelf or a set of hooks. I keep gloves, a hand pruner, a roll of twine, and a pencil there, since those are the things I grab on the way out. Just make sure nothing sticks out far enough to catch on the frame.
A Step-by-Step Weekend Plan
If you want to tackle the whole job at once, here is the sequence I recommend. Most average sheds can be done over a single weekend.
- Empty the shed onto a tarp and sort everything into keep, repair, donate, and discard piles.
- Clean and repair the structure: sweep, patch leaks, seal rodent entry points, and add weatherstripping.
- Measure and sketch a floor plan with zones marked by frequency of use.
- Install wall systems first: tool rails, pegboard, and shelving brackets anchored into studs.
- Add the potting bench or work surface and any overhead storage.
- Clean and sharpen tools before hanging them, oiling metal parts and sanding rough handles.
- Load the shed zone by zone, starting with heavy floor items, then long-handled tools, then shelves and bins.
- Label everything and trace tool outlines on pegboard.
- Set up a locked cabinet or high shelf for chemicals and move fuel to its designated spot.
- Do a walk-through test: pretend to start a typical garden job and see how quickly you can grab what you need. Adjust as needed.
Step six is worth taking seriously. There is no better time to service your tools than when they are all laid out in front of you. If you need a refresher, our guide on how to sharpen garden tools walks through files, whetstones, and angles for everything from hoes to pruners.
Habits That Keep It Organized
A system only works if you maintain it, and maintenance takes far less time than the initial project.
- Put it back the same day. A tool left leaning against the fence overnight is a tool you will be hunting for next week.
- Clean as you go. Keep a stiff brush and a bucket of sand mixed with a little oil near the door. Plunge digging tools in after use to scrub off soil and leave a thin protective coating.
- One in, one out. When you buy a new tool, decide what it replaces.
Seasonal Resets
Twice a year, in early spring and late fall, spend an hour on a quick reset. In spring, move planting tools, seed trays, and irrigation gear to the front. In fall, bring leaf rakes and pruning tools forward, drain hoses, winterize power equipment, and push summer gear to the back. This rotation keeps your prime zone filled with what you actually need right now.
Pro tip: Keep a small notebook or clipboard hanging inside the door. When you run out of something or notice a tool that needs repair, jot it down. Your spring shopping list will write itself.
Common Mistakes to Avoid
- Buying storage before decluttering. You end up organizing things you should have thrown away, and you often buy the wrong size of shelving.
- Using shelves that are too deep. Items migrate to the back and disappear. Shallow shelves keep everything visible.
- Storing tools on the floor. Floors collect moisture and trip hazards. Get tool heads up on the wall.
- Leaving bags open. Open seed and fertilizer bags attract rodents and absorb moisture. Use sealed bins.
- Mixing chemicals with everything else. Hazardous products need their own locked, well-ventilated spot.
- Ignoring the door path. If the mower blocks the door, the whole system fails every time you mow.
- Skipping labels. You will remember what is in each bin for about three weeks. Label everything.
- Hanging heavy items on drywall anchors or thin sheathing. Always screw rails and brackets into studs or solid blocking.
Conclusion
An organized garden shed is not about perfection or matching bins. It is about making your gardening easier. When every tool has a home you can reach in seconds, you spend more time in the beds and less time digging through clutter. Your tools last longer because they are dry, clean, and hung where they cannot be stepped on or buried.
Start with the clear-out, plan your zones around how you really work, and get as much as you can onto the walls. Store chemicals and fuel with care, build in a few simple habits, and do a quick reset twice a year. Do those things and your shed will stay a place you enjoy walking into, not one you avoid until spring forces your hand.
Frequently Asked Questions
Hang them head-up on a wall-mounted rail with hooks or on a board fitted with spaced dowels, anchored into studs. Keeping the metal heads off the floor protects them from moisture and rust and keeps them from becoming trip hazards.
Seal any gaps larger than a quarter inch with hardware cloth or metal flashing, and add weatherstripping around the door. Store seed, birdseed, and organic fertilizer in lidded metal or heavy plastic bins so there is nothing to attract rodents in the first place.
It can be if you use approved fuel containers, keep the quantity small, provide ventilation, and store it well away from any ignition source. Check your local fire codes, and keep fuel separate from pesticides and fertilizers.
Only if the shed stays cool and dry. Seeds last longest in sealed containers kept below about 70°F with low humidity, so if your shed gets hot in summer, keep seed packets indoors instead.
After the initial overhaul, a quick reset twice a year is usually enough. In spring, bring planting and irrigation gear forward, and in fall, move pruning and leaf tools to the front while winterizing hoses and power equipment.
You Might Also Like

Composting for Beginners: Turn Garden Waste into Black Gold
Turn leaves, grass clippings, and kitchen scraps into rich, crumbly compost. This beginner's guide covers greens and browns, choosing a bin, building a pile step by step, and fixing common problems.
Keep Reading
Types of Sprinklers
When you think of sprinklers, what comes to your mind? An image of you running through them? Yes, that is one of the main reasons why we love them so much. However, there are many…
Keep Reading
Types of Garden Sprayers
Looking for several Types of Garden Sprayers? When you were younger, you might have thought that water was all you need to care for your garden. However, you might have realized at some point in…
Keep Reading