
How to Sharpen and Maintain Garden Tools: The Complete Guide

Every spring I watch gardeners wrestle with shovels that bounce off clay, pruners that crush stems instead of slicing them, and hoes that push weeds around rather than cutting them off. Almost every time, the problem isn't the gardener or even the tool. It's a dull edge. A sharp tool does half the work for you, and a dull one makes you do all of it, plus a little extra.
I learned to sharpen tools in the potting sheds of Oregon State University, where the rule was simple: nobody put a tool back on the wall dirty or dull. That habit has saved me more money and more sore shoulders than any single purchase I've ever made. Good tools last for decades when they're cared for, and even inexpensive ones perform far above their price when you keep an honest edge on them.
In this guide I'll walk you through everything I do to keep my tools in working shape: the sharpening gear worth owning, the right angle for each kind of tool, step-by-step instructions for blades from pruners to shovels, and the cleaning, oiling, and storage habits that keep rust and splinters away. You don't need a workshop. A vise, a file, a stone, and an afternoon will get you started.
Why bother? A clean cut from a sharp pruner heals quickly, while a dull blade crushes and tears stems, leaving ragged wounds that invite disease. Sharp tools also take less effort, slip less, and last longer, because regular light touch-ups remove far less metal than one big rescue job on a neglected blade.
The Sharpening Kit You Actually Need
You'll see plenty of gadgets marketed for tool sharpening. Most gardeners only need a handful of basics, and many of them are probably already in your garage.
| Item | What It's For | Best Used On |
|---|---|---|
| Mill bastard file (8–10 inch, single cut) | Removing metal quickly and reshaping edges | Shovels, spades, hoes, edgers, axes |
| Diamond file or paddle (coarse and fine) | Fast, controlled sharpening on hardened steel | Pruners, loppers, hedge shears, knives |
| Whetstone or sharpening stone | Refining and polishing an edge | Pruners, garden knives, grafting knives |
| Bench vise or clamp | Holding the tool steady so both hands are free | Everything large enough to clamp |
| Wire brush and steel wool | Removing rust and caked-on soil | All metal parts |
| Medium-grit sandpaper (80–120) | Smoothing rough wooden handles | Shovels, rakes, hoes, forks |
| Light machine oil or boiled linseed oil | Protecting metal and conditioning wood | Blades, pivots, wooden handles |
| Heavy work gloves and safety glasses | Protecting hands and eyes from edges and filings | Every sharpening session |
Files vs. Stones vs. Grinders
A file cuts on the push stroke and moves metal fast, which makes it ideal for soft-steel digging tools. A stone or diamond plate removes less metal and produces a finer edge, which is what cutting tools like pruners need. Bench grinders are fast, but they generate heat that can ruin the temper of the steel, turning it soft. I rarely use one on garden tools, and when I do, I dip the blade in water every few seconds to keep it cool.
Safety: Always wear cut-resistant gloves and eye protection when sharpening. Clamp the tool whenever possible and file away from your body. Metal filings are sharp and can easily lodge in skin or eyes.
Understanding Bevels and Sharpening Angles
The bevel is the angled surface that forms the cutting edge. The single most important rule of sharpening is to follow the existing bevel. The manufacturer chose that angle for a reason, and matching it keeps the tool balanced between sharpness and durability.
A thin, acute angle is sharper but chips more easily. A steeper, blunter angle holds up to rocks and roots but won't slice as cleanly. Digging tools need toughness; cutting tools need keenness.
| Tool | Typical Bevel Angle | Bevel Sides |
|---|---|---|
| Bypass pruners and loppers | 20–30 degrees | One side (outer face of cutting blade) |
| Hedge shears | 30–40 degrees | One side per blade |
| Garden and pruning knives | 15–25 degrees | Usually both sides |
| Hoes | 25–45 degrees | Usually one side (inner face) |
| Shovels and spades | 45 degrees or steeper | Usually the inside (concave) face |
| Axes and hatchets | 25–30 degrees | Both sides |
Pro tip: Color the bevel with a permanent marker before you start. After a few strokes, look at where the ink has been removed. If the ink is gone only from the top or bottom of the bevel, adjust your angle until you're removing it evenly across the whole surface.
Step One: Clean Before You Sharpen
You can't sharpen through dirt, sap, or rust. Grit on the blade clogs files and stones, and resin hides nicks you need to see. I always clean first.
- Knock off the soil. Use a stiff brush or a putty knife to remove caked mud from digging tools. A bucket of sand mixed with a little oil works well for scrubbing, too.
- Dissolve sap. Wipe pruner and lopper blades with rubbing alcohol or a dedicated resin cleaner. Stubborn pitch from pines and conifers may need a few minutes of soaking.
- Remove rust. Scrub light rust with steel wool or a wire brush. For heavier rust, soak the metal parts in white vinegar overnight, then scrub and rinse thoroughly.
- Disassemble if practical. Many pruners come apart with a single nut and bolt. Taking them apart lets you clean the pivot and sharpen each blade properly.
- Dry completely. Towel off the tool and let it air dry before sharpening so water doesn't mix with filings and cause new rust.
Henry's note: When I take pruners apart, I lay the pieces on a towel in the exact order they came off. Springs, washers, and nuts look nearly identical once they're mixed up, and a phone photo before disassembly has saved me more than once.
How to Sharpen Pruners and Loppers
Hand pruners and loppers are the tools I sharpen most often, because a slightly dull edge makes a big difference in cut quality. If you're not sure which style you own, our guide to types of pruning shears explains the differences between bypass and anvil designs.
Bypass Pruners and Loppers
Bypass tools have a sharpened cutting blade that slides past a thicker hook, or anvil jaw. Only the cutting blade needs sharpening, and only on its beveled side.
- Clamp the pruner in a vise with the beveled side of the cutting blade facing up, or hold it firmly against a workbench.
- Hold a diamond file or small stone flat against the bevel at its existing angle.
- Stroke from the base of the blade toward the tip in a smooth, sweeping motion, following the curve of the blade.
- Work evenly along the whole edge, using about 5–10 strokes at first, then check your progress.
- When you feel a slight burr on the flat back side of the blade, you've sharpened enough.
- Lay the file or a fine stone completely flat on the back of the blade and make one or two light passes to remove the burr. Never create a bevel on the flat side.
- Clean off the filings, oil the pivot, reassemble, and test on a piece of paper or a small twig.
Anvil Pruners
Anvil pruners have a single blade that closes onto a flat surface. That blade is usually beveled on both sides, so sharpen each side equally to keep the edge centered. If the anvil is badly dented or grooved, it's often better to replace the anvil insert, which many models allow.
Hedge Shears
Hedge shears have two long blades, each with a bevel. Sharpen each blade separately with a flat file, following the existing angle, and remove the burr from the flat inside face. Keep the angle consistent along the full length so the blades meet evenly from base to tip.
Pro tip: If your pruners still won't cut cleanly after sharpening, check the pivot bolt. A loose pivot lets the blades separate and fold the stem instead of cutting it. Tighten it just until the blades close smoothly without wobble.
How to Sharpen Shovels, Spades, and Hoes
Most people never sharpen their shovels, and that's a shame. A sharpened spade makes edging beds, dividing perennials, and cutting through roots dramatically easier. If you're choosing a new digging tool, our overview of types of shovels covers which shapes are worth sharpening and which are meant to stay blunt for scooping.
Shovels and Spades
- Clamp the shovel in a vise with the blade facing up and the inside (concave) face toward you.
- Using a mill bastard file, push the file along the existing bevel at roughly 45 degrees. Files cut on the forward stroke only, so lift on the return.
- Work from one corner to the center, then from the other corner to the center, keeping the curve of the blade intact.
- Continue until you have a clean, bright edge about 1/8 inch wide. You're aiming for "butter knife sharp," not razor sharp.
- Flip the shovel and take one or two light passes on the back to remove the burr.
Hoes
A sharp hoe slices weeds just below the soil surface instead of dragging them out, which disturbs less soil and brings up fewer weed seeds. Stirrup and collinear hoes especially benefit from a keen edge. Clamp the hoe and file along the existing bevel, usually on the inside face, then remove the burr.
Henry's note: I touch up my favorite spade with a few file strokes before every major digging session. It takes two minutes, and the difference when cutting through turf is remarkable. In our heavy Willamette Valley clay, it's the difference between a pleasant afternoon and a miserable one.
Knives and Mower Blades
Garden and Pruning Knives
Knives need the finest edge of any garden tool. Use a whetstone, starting with a coarse grit and finishing on a fine one. Hold the blade at a consistent angle (roughly 20 degrees for most garden knives) and draw it across the stone as if slicing a thin layer off the surface. Alternate sides for an even edge. Grafting knives are usually beveled on one side only, so sharpen just that side. For more on blade styles and uses, see our guide to types of garden knives.
Lawn Mower Blades
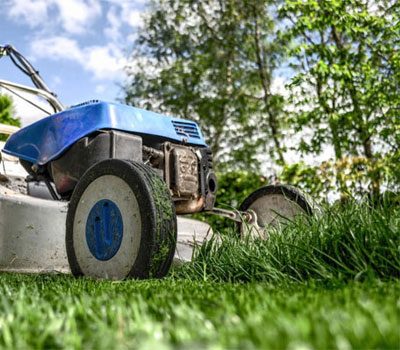
Mower blades should be sharpened at least once a season, more often if you mow over sandy soil. Always disconnect the spark plug or remove the battery before removing the blade, mark which side faces down, and check balance after sharpening by hanging the blade on a nail. A blade that tips to one side needs more metal removed from the heavy end.
Safety: Never work on a mower blade with the engine able to start. Disconnect the spark plug wire on gas mowers and remove the battery on electric models before you reach under the deck.
Caring for Handles, Springs, and Pivots
A sharp blade on a splintered, loose handle is still a bad tool. Maintenance means looking after the whole thing.
Wooden Handles
Once a year, sand wooden handles with medium-grit sandpaper to remove splinters and rough spots, then wipe on a coat of boiled linseed oil. Let it soak in for 15–20 minutes, wipe off the excess, and let it cure for a day. Repeat if the wood is very dry. This keeps the wood from cracking and makes it more comfortable to hold.
Safety: Rags soaked in linseed oil can spontaneously combust as they dry. Lay them flat outdoors to dry completely, or store them in a sealed metal container filled with water before disposal.
Pivots and Springs
Put a drop of light machine oil on every pivot after cleaning, then work the tool open and closed a few times. Check springs for rust or fatigue. Replacement springs are inexpensive and restore the snap that makes pruners comfortable to use.
Storage and a Seasonal Maintenance Schedule
How you store tools matters as much as how you sharpen them. Moisture is the enemy of steel and wood alike.
- Hang tools off the ground. Wall racks keep blades from resting in damp spots and prevent edges from banging together.
- Keep them dry. Store tools in a shed or garage, never leaning against the house in the rain.
- Use an oil-sand bucket. Fill a bucket with builder's sand and mix in a quart or so of vegetable or light mineral oil. Plunge digging tools in a few times after each use to scrub and coat them.
- Cover sharp edges. Blade guards or sheaths protect both the edge and your hands.
If your shed is more of a jumble than a system, our guide on how to organize a garden shed has practical layouts that make it easy to put tools away properly.
| When | Task |
|---|---|
| After every use | Knock off soil, wipe sap from blades, dry before storing |
| Monthly during the season | Touch up pruner and hoe edges, oil pivots |
| Early spring | Sharpen all cutting and digging tools, sharpen mower blade |
| Late fall | Deep clean, remove rust, oil all metal, treat wooden handles |
| Winter | Replace worn springs, handles, and anvils; repair loose heads |
Pro tip: Paint the handles of your tools a bright color, or wrap them with colored tape. It makes them easy to spot when you set them down in the grass, and fewer tools get left out overnight to rust.
Common Mistakes to Avoid
I've made nearly every one of these at some point.
- Changing the bevel angle. Sharpening at a random angle creates a rounded, weak edge. Match the factory bevel.
- Sharpening the flat side of bypass pruners. The back of the cutting blade must stay perfectly flat so it glides tight against the hook. Beveling it creates a gap, and stems will fold instead of cutting.
- Overheating with a grinder. If the steel turns blue or straw-colored, it has lost its temper and won't hold an edge. Go slowly and cool frequently.
- Making digging tools too sharp. A razor edge on a shovel will chip or roll the first time it hits a rock. Aim for a sturdy edge.
- Using a file backward. Dragging a file back across the metal dulls the file's teeth. Lift it on the return stroke.
- Skipping the cleaning step. Sharpening over sap and rust wears out files and stones and gives poor results.
- Forgetting to oil afterward. Freshly sharpened steel is bare and rusts quickly. Always finish with a light coat of oil.
Final Thoughts
Sharpening and maintaining garden tools isn't a chore reserved for experts. With a file, a stone, some oil, and a little patience, you can keep every blade in your shed working as well as the day you bought it, and often better. Start with the tools you use most, like your pruners and favorite spade, and you'll feel the difference immediately.
Make it a habit: clean after every use, touch up edges through the season, and give everything a thorough going-over in fall and spring. Your plants will heal faster, your back will thank you, and your tools will outlast many seasons of hard work. See you in the garden.
Frequently Asked Questions
Pruners and hoes benefit from a quick touch-up about once a month during the growing season, or whenever they start tearing stems. Shovels and spades need sharpening once or twice a year, typically in early spring. Heavy users in rocky soil may need to sharpen more often.
A small diamond file or fine sharpening stone works best for pruners because it removes metal gradually and leaves a clean edge. Sharpen only the beveled side of the cutting blade and keep the back perfectly flat. Finish by removing the burr with one light pass on the flat side.
You can, but it's easy to overheat the steel and ruin its temper, which leaves the edge soft. If you use a grinder, work in short passes and dip the blade in water frequently. For most garden tools, a hand file is safer and gives you more control.
Soak the metal parts in white vinegar overnight, then scrub with steel wool or a wire brush. Rinse and dry thoroughly, then sharpen and apply a light coat of oil right away. Avoid soaking wooden handles in vinegar.
A shovel should be about as sharp as a butter knife, not a razor. A moderately sharp edge at around 45 degrees cuts through roots and sod easily while staying durable enough to handle rocks. An overly thin edge will chip or roll quickly.
You Might Also Like

Types of Pruning Shears and How to Use Them
Bypass or anvil? Loppers or hedge shears? Learn which pruning tool fits each job, how to make clean cuts that heal fast, when to prune common shrubs and trees, and how to care for your blades.
Keep Reading
Types of Trowels
Looking for Types of Trowels or types of garden trowels? In one of my earlier posts, I talked about an indispensable gardening tool known as pruning shears.
Keep Reading
Types of Shovels
A shovel is a popular hand tool that seems to be around since forever. It features a wide, broad blade that’s attached to a handle. It’s used to move things around like snow, rocks, soil,…
Keep Reading